

Whole House Surge Protector Installation Cost
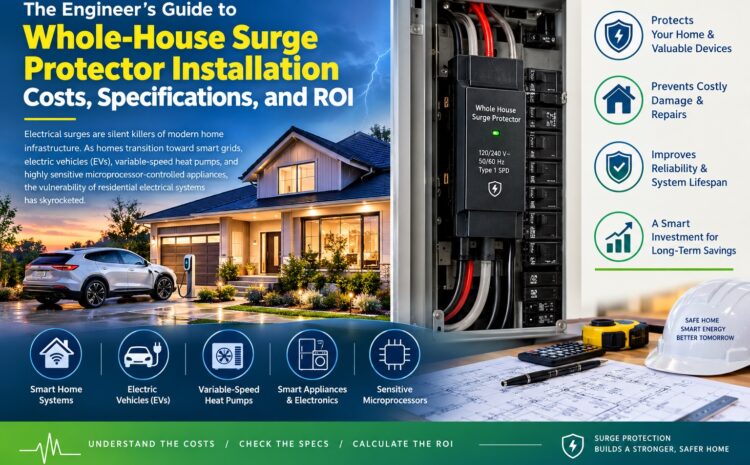
The Engineer’s Guide to Whole-House Surge Protector Installation Costs, Specifications, and ROI
Electrical surges are silent killers of modern home infrastructure. As homes transition toward smart grids, electric vehicles (EVs), variable-speed heat pumps, and highly sensitive microprocessor-controlled appliances, the vulnerability of residential electrical systems has skyrocketed.
As an electrical engineer, I view a home not just as a living space, but as a complex local distribution network. In this comprehensive guide, we will break down the true engineering and financial realities of whole-house surge protector installation costs. We will analyze why these devices are necessary, the underlying physics of transient overvoltages, component selection, labor variables, and how to calculate your true return on investment (ROI).
- Executive Summary: The Bottom Line on Installation Costs
If you are looking for a quick financial snapshot before diving into the electrical engineering specifics, here is what you can expect to pay for a professional installation in 2026:
Cost Component | Low-End Estimate | Average/Typical Cost | High-End / Complex Cost |
Hardware / SPD Device | $50 | $120 – $250 | $600+ |
Electrical Labor (1-2 Hours) | $100 | $150 – $300 | $600+ |
Required Materials (Breakers, Conduit) | $20 | $40 – $70 | $150+ |
Total Upfront Investment | $170 | $310 – $620 | $1,350+ |
Core Cost Drivers:
- The Surge Protective Device (SPD) Type and Rating: Higher surge current capacities (\(I_{max}\) or \(I_{n}\)) and lower Voltage Protection Ratings (VPR) command premium hardware prices.
- Electrical Panel Condition and Space: Standard installations assume an open, dual-pole slot is available on the bus bar. If your panel is maxed out, requires a sub-panel addition, or needs a total service upgrade, costs will scale significantly.
- Geographic Labor Rates: Electrician labor varies wildly by region, typically ranging from $75 to $200 per hour.
- The Physics of Transients: Why Whole-House Protection is Mandatory
To understand the cost of protection, we must first understand the threat model. In electrical engineering, a surge is properly defined as a transient overvoltage. These are short-duration microsecond bursts of high energy that propagate through electrical conductors.
Voltage Spike (Transient)
^ _
| / \
Normal |——–/—\——- 120V RMS (Nominal Peak ~170V)
Wave | / \
+——+——-+—–> Time (Microseconds)
Transients are characterized by a incredibly steep rise time (dv/dt), meaning the voltage escalates to dangerous levels in a matter of nanoseconds or microseconds.
External vs. Internal Surges
While the general public associates surges exclusively with catastrophic lightning strikes, the reality within power distribution networks is much more insidious:
- External Transients (~20% of occurrences): These originate outside the home. Causes include cloud-to-ground lightning strikes hitting distribution lines, utility grid switching, transformer failures, or inductive coupling from high-voltage transmission lines. These are high-energy events that can immediately destroy unprotected insulation systems.
- Internal Transients (~80% of occurrences): These are generated inside your home’s electrical envelope. Every time inductive loads—such as your air conditioner’s compressor, refrigerator motor, vacuum cleaner, or heat pump—cycle on and off, they create a counter-electromotive force (Back EMF). This inductive kickback injects a micro-transient into your branch wiring.
While a single internal transient rarely destroys an appliance instantly, the cumulative effect of thousands of mini-surges over time degrades the delicate silicon junctions of microprocessors, leading to premature appliance failure—a phenomenon engineers call electronic degradation.
- The National Electrical Code (NEC) Mandate
If you are upgrading your electrical panel or building a new home, whole-house surge protection is no longer optional.
Beginning with the 2020 National Electrical Code (NEC) Section 230.67 and carried forward into subsequent code cycles, a Surge Protective Device (SPD) is mandated for all new and replacement residential service equipment.
The code recognizes that modern life support, safety systems (GFCI breakers, AFCI breakers, smoke detectors), and infrastructure require foundational protection at the service entrance. Therefore, if an electrician quotes you for an SPD during a panel swap, they are not upselling you; they are complying with federal safety codes.
- Deconstructing the Hardware: SPD Types and Engineering Specifications
When selecting an SPD, you aren’t just buying a plastic box; you are specifying an engineering solution. The market categorizes these devices into three primary “Types” based on their location within the electrical topology.
[ Utility Grid ] —> [ Electric Meter ] —> [ Main Panel ] —> [ Wall Outlets ]
| | |
( Type 1 SPD ) ( Type 2 SPD ) ( Type 3 SPD )
Type 1 SPDs: Line-Side Protection
- Location: Installed on the line side of the main service disconnect (between the utility transformer and your main breaker).
- Hardware Cost: $150 to $500
- Application: Ideal for areas with high lightning activity. They are designed to withstand massive external current impulses. Because they mount before the main breaker, installation requires pulling the utility meter, which adds to labor costs.
Type 2 SPDs: Load-Side Protection (Most Common)
- Location: Installed on the load side of the main service disconnect, usually mounted inside or directly adjacent to your main circuit breaker panel.
- Hardware Cost: $70 to $300
- Application: This is the standard “whole-house surge protector” chosen by most homeowners. It connects directly to the panel bus bars via a dedicated two-pole circuit breaker.
Type 3 SPDs: Point-of-Use Protection
- Location: Standard surge strip plug-ins or specialized SPD receptacles.
- Hardware Cost: $15 to $80
- Application: These cannot protect the whole house. Instead, they act as the final line of defense for ultra-sensitive electronics (computers, home theater systems), catching any residual voltage passed by the Type 1 or Type 2 devices.
- Technical Specifications That Impact Cost
When reviewing hardware options, four critical electrical specifications dictate the price and performance of the unit:
- Maximum Surge Current Capacity (\(I_{max}\))
Measured in kiloamperes (kA), this specifies the maximum amount of surge current the device can safely redirect to ground in a single event without failing.
- Entry-level units: 36 kA to 50 kA ($70 – $100)
- Commercial-grade residential units: 80 kA to 140 kA ($120 – $250)
- Industrial-grade units: 200 kA+ ($300+)
- Engineering Insight: A higher kA rating does not mean the device stops bigger surges; it means the internal array of Metal Oxide Varistors (MOVs) can absorb multiple smaller hits over a longer lifespan before sacrificing itself.
- Voltage Protection Rating (VPR)
Approved by Underwriters Laboratories (UL 1449), the VPR is the “clamping voltage.” It represents the maximum residual voltage the SPD will allow to pass through to your home’s wiring during a standard test transient.
- Lower is better. A standard VPR for a good Type 2 device is 600V or 700V on a 120V line. Cheap units may have a VPR of 800V or 1000V, exposing your electronics to higher stress during a spike.
- Maximum Continuous Operating Voltage (MCOV)
The MCOV defines the maximum voltage the device can sustain continuously without entering clamping mode. For a standard 120/240V split-phase home system, the MCOV is typically rated around 150V line-to-neutral and 300V line-to-line. A higher MCOV prevents the unit from overheating during minor utility grid overvoltages or sags.
- Nominal Discharge Current (\(I_{n}\))
This tests the durability of the unit under repeated stress. It measures the device’s ability to survive 15 successive surge repetitions at a specified current level (usually 10 kA or 20 kA). Look for a UL rating indicating an \(I_{n}\) of 20 kA for premium longevity.
- Real-World Hardware Comparisons
To give you an idea of what your hardware budget buys, let’s look at three popular industry standards used by professional electricians:
Option A: The Budget Workhorse – Square D HEPD80
- Estimated Hardware Cost: ~$80 – $100
- Surge Current Capacity: 80 kA
- VPR: 600V (Line to Neutral)
- Best For: Standard single-family homes with minimal smart home infrastructure looking for foundational, code-compliant protection.
Option B: The Industry Standard – Eaton CHSPT2ULTRA
- Estimated Hardware Cost: ~$130 – $160
- Surge Current Capacity: 108 kA
- VPR: 600V (Line to Neutral)
- Best For: The sweet spot for price and performance. It offers massive multi-strike capabilities and excellent reliability.
Option C: The Premium Choice – Siemens FS140
- Estimated Hardware Cost: ~$220 – $270
- Surge Current Capacity: 140 kA
- VPR: 600V
- Best For: Homes with high-end luxury appliances, extensive automation systems, EV charging stations, or properties located in high-lightning zones (e.g., Florida or the Gulf Coast).
- The Labor Breakdown: What Are You Paying For?
Unless you are an electrical engineer or an exceptionally experienced DIYer who understands structural safety protocols inside a live panelboard, labor should always be handled by a licensed electrician.
A typical installation takes between 1 to 2 hours if the panel is accessible and has room. Here is the structural breakdown of what a professional electrician does during that time:
[ Step 1: Panel Assessment ]
│
▼
[ Step 2: System De-energization ]
│
▼
[ Step 3: Knockout & Mounting ]
│
▼
[ Step 4: Breaker & Bus Bar Tie-In ]
│
▼
[ Step 5: Lead Length Optimization (Crucial!) ]
│
▼
[ Step 6: Testing & Commissioning ]
The 6 Steps of Professional Installation:
- Panel Assessment: The electrician inspects the service entry, verifies system grounding loop integrity, and identifies an optimal location for mounting the SPD.
- System De-energization: The main service breaker is thrown to kill power to the panel bus bars. (Note: The line-side lugs feeding the main breaker remain live, requiring extreme care).
- Knockout and Mounting: A knockout hole is removed from the side or bottom of the panel box. The SPD is mounted externally using standard chase nipples or offset conduits. Alternatively, if it is a flush-mount panel inside a finished wall, specialized flush kits are deployed.
- Breaker and Bus Bar Tie-In: The device’s phase conductors (usually black and red wires) are terminated into a new, dedicated dual-pole circuit breaker (typically 20A to 50A, depending on manufacturer specs). This breaker acts as the manual disconnect and overcurrent safety mechanism for the SPD itself.
- Lead Length Optimization: The neutral (white) and ground (green/bare) wires are trimmed and bonded tightly to their respective termination bars.
- Testing and Commissioning: Power is restored, and the unit’s diagnostic LEDs are verified to ensure proper internal diagnostic circuitry indicates active protection.
- The Critical Importance of Lead Length Physics
From an electrical engineering perspective, the quality of a whole-house surge protector installation boils down to one factor: lead length.
If your electrician installs the SPD but leaves long, coiled loops of wire inside the panel to make it look neat, they have severely compromised the device’s protective capacity.
The Math Behind Lead Length
Wires possess intrinsic inductance (≈ 0.2 to 0.4 μH per foot). When a high-frequency surge (dv/dt) encounters an inductor, the inductor resists the sudden change in current, creating a dramatic inductive voltage drop across the wire according to the fundamental formula:
\(V=L\cdot \frac{di}{dt}\)
Where:
- V = The induced voltage drop across the connecting wire.
- L = The inductance of the wire (proportional to length).
- \(\frac{di}{dt}\) = The rate of change of the surge current over time.
During a lightning-induced surge, the rate of current rise (\(\frac{di}{dt}\)) can easily reach 10 kiloamperes per microsecond. If the connecting leads are too long, the voltage drop across the wire can add hundreds of volts to your SPD’s clamping rating.
Total Voltage Seen by Your Appliances = SPD VPR Clamping Voltage + Wire Inductive Voltage Drop (V = L * di/dt)
If the unit’s internal VPR is 600V, but 3 feet of extra wire adds another 600V of inductive drop during a fast surge, your appliances are exposed to 1200V before the unit can safely divert the energy to ground.
The Rule of Thumb: Leads must be kept as short, straight, and devoid of sharp bends as humanly possible (ideally under 12 inches). Instruct your installer to mount the SPD directly adjacent to the dedicated breaker slot to minimize this distance.
- Complications and Upcharges: When Costs Escalate
While a standard installation falls comfortably within the $300 to $600 range, real-world residential infrastructure often presents complications. Below are common variables that will drive up your total invoice:
- No Empty Space in the Electrical Panel
- The Problem: A Type 2 hardwired SPD requires two adjacent slots to accept a 240V dual-pole breaker. If your panel is completely full of single breakers, the electrician cannot connect the unit.
- The Solution: The electrician must either install tandem breakers (if the panel listing allows it) to free up space, or install a small external sub-panel.
- Added Cost: $150 to $450 for labor and materials.
- Upgrading an Deficient Grounding System
- The Problem: An SPD functions by shunting excess current to the earth. If your home relies on an outdated, corroded, or high-resistance grounding loop (e.g., a single old ground rod or unbonded water pipes), the surge energy has nowhere to go.
- The Solution: The electrician must drive new dual copper-clad ground rods and run fresh #4 AWG copper grounding electrode conductors to ensure a low-impedance path to the earth.
- Added Cost: $250 to $600.
- Flush-Mounted Panels in Finished Drywall
- The Problem: If your electrical panel is flush-mounted inside a finished garage wall or utility closet, there is no exposed side knockout to mount the SPD box.
- The Solution: The electrician must cut out a small section of drywall, mount the device inside the wall cavity using a flush-mount trim kit, or locate an internal panel-insert style SPD (like the Square D QO Surgebreaker).
- Added Cost: $50 to $150 (plus structural drywall patch repair costs).
- Multiple Panels or Detached Structures
- The Problem: If your property features a main 200A service panel, but also has a 100A sub-panel in a detached garage, workshop, or pool house, a single whole-house protector at the main panel will not fully isolate the sub-panel circuits from inductive pickup or local faults.
- The Solution: A primary Type 2 SPD must be installed at the main service equipment, and secondary, lower-capacity Type 2 or Type 3 SPDs must be deployed at each downstream sub-panel.
- Added Cost: $200 to $400 per additional panel.
- Calculating ROI: Is a Whole-House Protector Worth the Money?
To justify the cost of an installation to your household budget, we can run a quick Risk-Mitigation ROI calculation.
Inventorying the Target Infrastructure
Walk through a modern home and calculate the replacement cost of items containing vulnerable microprocessors:
- Smart Refrigerator / Freezer: $2,000 – $4,500
- Variable-Speed HVAC Inverter / Heat Pump Board: $800 – $2,500
- Washer & Dryer Sets: $1,200 – $2,500
- Smart TVs, Soundbars, Home Theater: $1,500 – $4,000
- Laptops, Workstations, Network Routers: $2,000 – $5,000
- EV Charging Station (EVSE): $500 – $1,200
- LED Lighting Drivers (Whole House): $300 – $1,000
- Total Exposed Capital Assets: $10,300 – $20,700+
The Cost-Benefit Equations
Let’s look at the financial trade-offs over a 5-year timeline:
\(\text{Cost\ of\ Protection}=\text{Initial\ Installation\ ( $450)}+\text{Zero\ Maintenance\ Costs}=\mathbf{\$450}\)
\(\text{Cost\ of\ Single\ Failure\ Event}=\text{HVAC\ Mainboard\ Fried}~(\$1,200)+\text{Electrician\ Emergency\ Fee}~(\$250)=\mathbf{\$1,450}\)
Even if you ignore catastrophic lightning entirely, avoiding just one premature control board failure on your furnace or refrigerator over a ten-year window completely covers the cost of the device.
Furthermore, many premium SPD manufacturers (such as Eaton and Siemens) include comprehensive connected-equipment warranties (often ranging from $25,000 to $75,000). If a surge passes through their properly installed device and destroys your downstream electronics, the manufacturer’s insurance policy covers the replacement value of your appliances—provided you have proof the unit was installed by a licensed electrician.
- Can You DIY a Whole-House Surge Protector Install?
If you look up the price of a Type 2 SPD online, you will see the hardware costs around $100. This prompts many handy homeowners to ask: Can I save the labor fee and install this myself?
From an engineering and safety perspective, DIY installation is highly discouraged for non-qualified individuals for several reasons:
- Arc Flash Hazard: Opening the dead-front cover of an electrical panel exposes raw, uninsulated service bus bars. If you accidentally drop a screw or slip with a screwdriver, you can trigger an arc flash—an explosive electrical short circuit that releases blinding light, intense heat, and molten metal.
- The Main Lugs are Always Live: Even when you turn off the main 200A breaker, the thick incoming cables coming straight from the electric meter remain completely energized. Touching them can be fatal.
- Warranty Voidance: Most equipment manufacturers explicitly state in their warranty terms that connected-equipment insurance claims are null and void unless accompanied by an invoice from a certified, licensed electrical contractor.
- Code Compliance: An improperly sized breaker or bad wire tap can violate NEC rules, potentially invalidating your homeowner’s insurance policy in the event of an electrical fire.
- Maintaining and Troubleshooting Your Protection System
Whole-house surge protectors are solid-state devices with no moving parts, but they are not “set-it-and-forget-it” systems forever.
The Sacrificial Nature of MOVs
Inside the device are components called Metal Oxide Varistors. Think of an MOV as a pressure-relief valve for voltage. Under normal operating conditions, it acts as an open switch with high resistance, letting standard current flow past it into your home.
When voltage spikes above the clamping threshold, the MOV instantly changes into a closed circuit with incredibly low resistance, absorbing the high voltage and dumping the massive current down into the ground wire.
Normal Voltage (120V) –> [ High Resistance MOV ] –> Current passes safely to appliances.
Surge Voltage (>600V) –> [ Low Resistance MOV ] –> Current shunted instantly to Ground!
Every time an MOV performs this shunting action, a tiny portion of its internal material degrades. Eventually, after absorbing hundreds of minor utility surges or one massive nearby lightning event, the MOV reaches its end-of-life and permanently opens.
Reading the Status Lights
Every reputable whole-house protector includes physical diagnostic lights on its chassis:
- Solid Green LEDs: The unit is functioning perfectly; your protection circuit is actively shielding your home infrastructure.
- Red Light or Light Off: The internal protection components have been expended. The unit has sacrificed itself to save your home. The device is no longer protecting your property and must be uninstalled and replaced immediately.
Recommendation: Make it a habit to check the status light on your electrical panel at least twice a year—ideally during daylight savings time when you check your smoke detector batteries.
- Summary Checklist for Homeowners
When you are ready to move forward with adding a whole-house surge protective layer to your home, use this technical checklist to guide your conversations with local electrical contractors:
- Verify Panel Space: Ensure your panel has two available adjacent vertical breaker slots.
- Specify Hardware Class: Insist on a reputable UL 1449 4th Edition listed Type 2 device with a surge current capacity of at least 80 kA to 108 kA.
- Enforce Lead Optimization: Remind the electrician that you want the lead wires kept as short and straight as possible to keep the inductive voltage drop low.
- Confirm Dedicated Disconnect: Ensure the unit is tied to its own dedicated dual-pole breaker (typically 20A or 30A based on manual specs) rather than double-lugged onto an existing appliance breaker.
- Inspect Grounding Loop: Ask the electrician to perform a quick visual inspection of your main grounding electrode system to guarantee the surge energy has an adequate path to the earth.
Implementing a robust, whole-house surge protection strategy is one of the most cost-effective upgrades you can make to your home’s electrical infrastructure. For an average cost of $300 to $600, you secure a commercial-grade defensive line that preserves your appliances, satisfies national safety codes, and delivers long-term financial peace of mind.
To help tailor this guide for your site or give you more precise estimates, please let me know:
- What is the make, model, or age of your electrical panel?
- Do you have any open breaker slots, or is the panel completely full?
- Are you planning to protect specialized equipment like an EV charger or a solar inverter system?



Write a Comment